Big changes are under way at Logan on the Chesapeake, Wheeling and Erie Railroad. Several e-mail exchanges with good friends Stuart Thayer and Anthony Hardy earlier in the week pointed out the lack of an ammonium nitrate unloader on the layout. I told them that I had always wanted one but had been unable to find an appropriate location. I pointed out several potential locations and the problems with each. While the issues weren't insurmountable, the locations weren't ideal. Then it hit me- it could be located at Logan. The short spur here has served as a team track during operating sessions, but I had never come up with how the area would be treated from a scenery and structure perspective. Possible options included remnants of a now out-of-service truck dump loader or some other small structure. I was also concerned about the scenery in this area as there is a bit of space between the end of the spur and a small culvert just out of site to the left of the photo.

A quick check revealed that the unloader would fit here and would probably leave room for a team track at the end of the spur. However, the spur would have to be moved and extended. And as long as I was tearing up track in this area, I decided to replace the commercial turnout. While it hasn't given me trouble yet, several others had and I was planning to replace it at some point anyway.
The photo below shows the area after removal of the old spur and turnout and after the new homosote and switch ties were put down.
In the picture below, you can the extension of the spur. There will be enough room for a two-bin unloader and a team track area at the very end of the spur.
I use Micro Engineering wood ties for the track and 3/32" x 3/32" basswood for the turnout ties. The turnout ties are sanded until they are level with the surrounding track ties. Over the years, as I laid new track I pulled out ties that were slightly irregular or damaged and saved them in a separate bag for use on spurs. I also made a jig for ties that had slightly wider spacing than mainline track. The photo below shows the spur ties, and you can see the slight difference in spacing versus the mainline in the background.
Thanks to the input and prodding from two good friends, I'm fixing a problem area that had perplexed me for years, adding a new industry that I had always wanted to model, and replacing a turnout that had been on the to-do list for a long time. More to come on this as progress continues.
Back in the early 1980's I came across an article in Model Railroader about the wide vision caboose fleet of the Soo Line. There were numerous photos and several drawings of the various versions of the cabooses. What was most noticable about the different versions was the changes in window placements. Some had two windows on the side, some had one, and some had none. There were also different window arrangements on the ends. At the time I was just developing the caboose roster for my railroad and I decided to modify some Athearn wide vision caboose kits in a similar manner to the Soo. In addition to providing some variety to the fleet, the changes could represent different orders acquired at different times which would help lend credibility to the free-lanced railroad.
The major changes to the kits included changing the windows, moving the truck bolsters closer to the ends and trimming the bottom of the cupola. In the photo below you can see the original kit and the modified version.
In studying the photos of the Soo Line cabooses, it became apparent that the kit needed some modifications to more closely represent the wide vision cabooses of the era. That lead to moving the truck bolsters out toward the ends and trimming the bottom of the cupola. Other changes included the addition of Cal Scale cushioned underframes, removing the cast-on grab irons and replacing them wire brass wire, and adding a few additional details such as firecracker antennas and vents. New end railings were fabricated using brass wire and styrene for the kick plates.
I also decided to model several different classes of cabooses in order to add some variety to the fleet. In the photos below you can see the Class C6, C6A, and C7 variations.
The small windows on the sides of the C6A and C7 class were cut from the ends of a spare wide vision kit and spliced into the side. The original Class C6 were delivered with roofwalks and ladders, and I added an etched brass roofwalk along with ladders on the end. Note also the different placement of the stacks on the two classes.
In addition to changes in windows on the sides, I also changed the end window configuration on the C7 class as you can see in the photo below.
Once operations started on the layout I needed to expand the size of the wide vision caboose fleet. While the Athearn cars were fun to do at the time, they were a significant amount of work. I had seen numerous photos and reviews of the Atlas wide vision caboose and it seemed like a logical candidate. I purchase three of them on EBay, stripped the paint using 90% isopropyl alcohol, and added a few details. I also blanked out the middle window on each side to give them a slightly different appearance and because the road name wouldn't fit anywhere else. The photo below shows the Atlas and Athearn kits together.
Here's a close-up of the Atlas kit.
The three Atlas cars were weathered in varying degrees as you can see in the photo of the two cars below.
I used overhead photos of Chessie System wide vision cabooses that I took from the Hopple Street Viaduct in Cincinnati back in the early 1980's to weather the roofs.
The photo below shows the whole fleet of wide vision cabooses.
The Atlas kits are beautiful, and I plan to add more to the fleet as operations expand further.
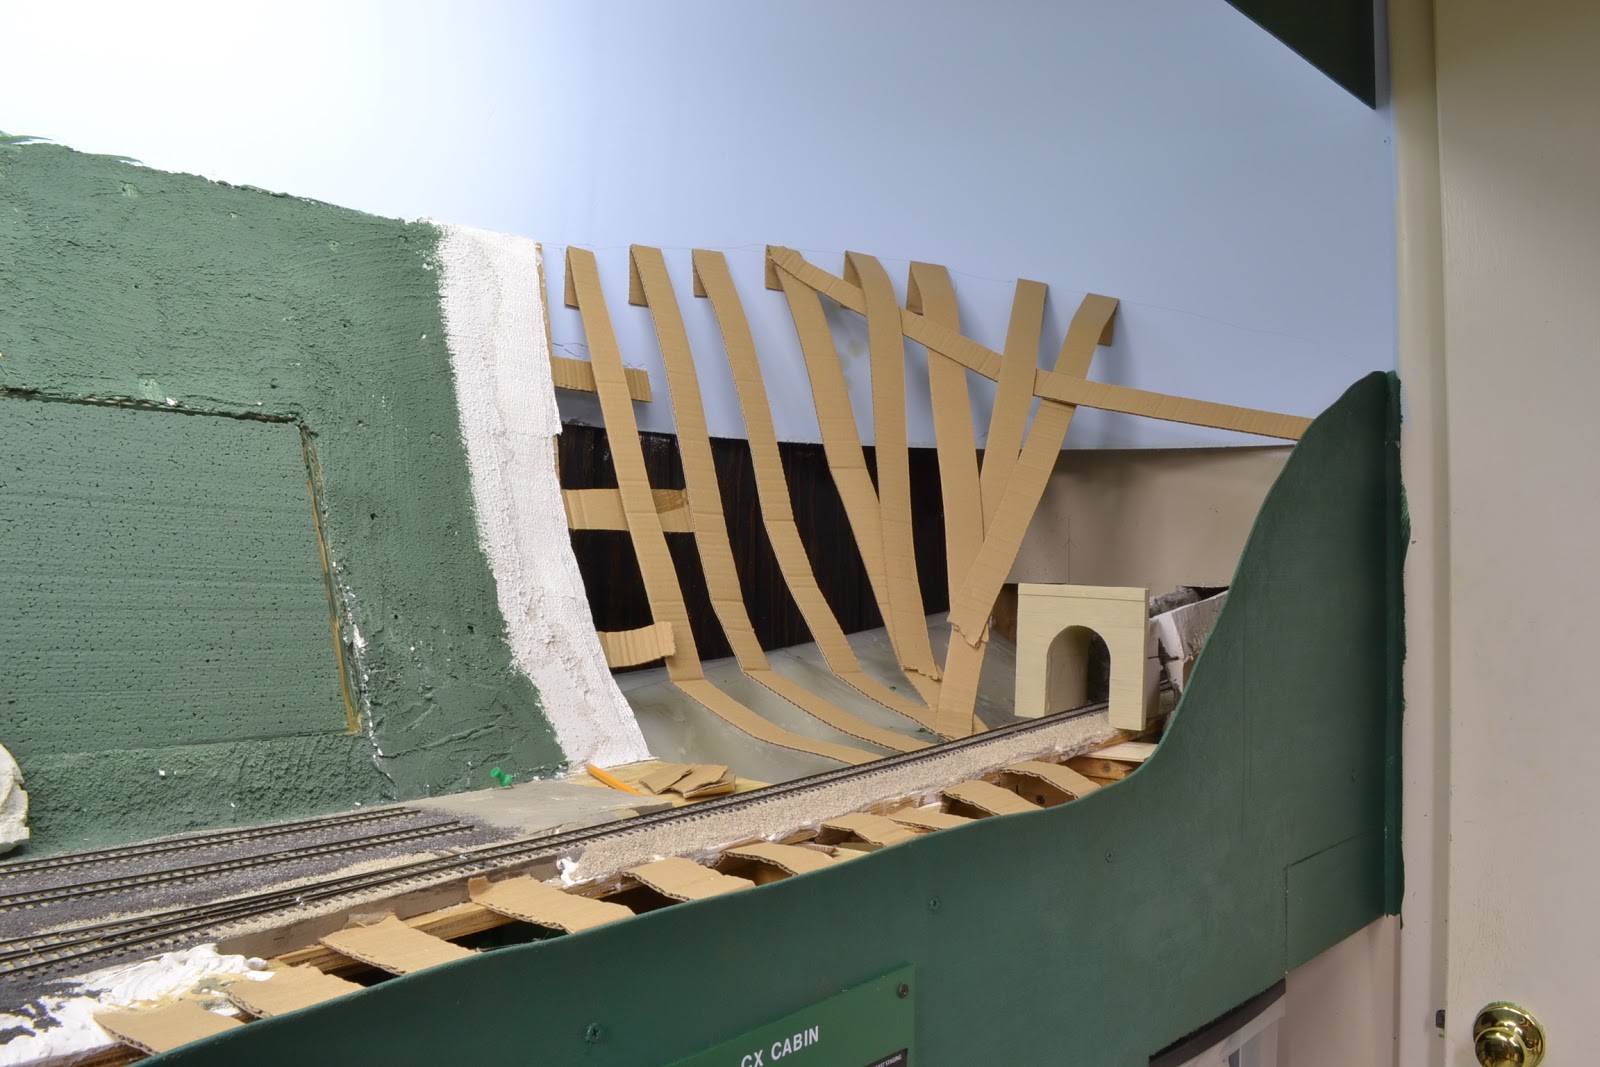
This past week I completed the last of the hardshell scenery on the layout. I have worked my way around the layout, in a somewhat hap-hazard fashion until all that was left to do was small portion of hardshell where the Wilson Bridge Branch leaves the room and heads to staging. The photo below shows the area with first pieces of cardboard webbing in place and the tunnel portal prior to weathering.
The next photo shows the entire area, including the diesel servicing facility at the east end of Nelsonville. There will be a small stream running beside the engine service facility and four bridges over the stream. I have always been a big fan of the C&O's Cane Fork Yard on the Cabin Creek Branch and this area will look very similar to that location.
To line the tunnel, I used several rock casting that my Stepfather made many years ago using aluminum foil.
The next step was to weather the front of the tunnel portal using artist's acrylics. Once I was reasonably happy with the results, I glued the portal in place and covered the area from just behind the face of the portal to the wall with a piece of cardboard. The rest of the webbing was then added between the fascia, the backdrop and the portal. I'll come back later and add some finishing touches to weathering on the face of the portal.
.JPG)
In the photo above you can see the new panel I made for CX Cabin. This location controls a hidden double crossover just to the left of the picture. You can see the removable piece of styrofoam, which allows access to the turnout, in the middel of the second picture. As I got ready to complete the scenery here, I realized that crews would need to be able to track their progress from the staging yard in the other room through the double crossover. The east end staging yard now has a 6-track upper section and a 6-track lower section. Trains coming from the upper section will need to take the diverging route through the crossover to get the main to Nelsonville. I installed IRDOT infrared detectors in this area and also on the hidden wye in order to be able to know when trains were clear of the crossovers.
The next step was to apply plaster impregnated gauze over the webbing and then cover it with structolite. The photo below shows the area at this point.
The photo below shows the area once the base coat of green paint was applied. I plan to paint the area around the face of the tunnel portal with tan paint prior to installing the finished scenery. And the two spurs behind the branch line will serve a small truck load tipple. I'm going to wait until I have a better idea of what this area will look before I finish applying the base coat of paint.
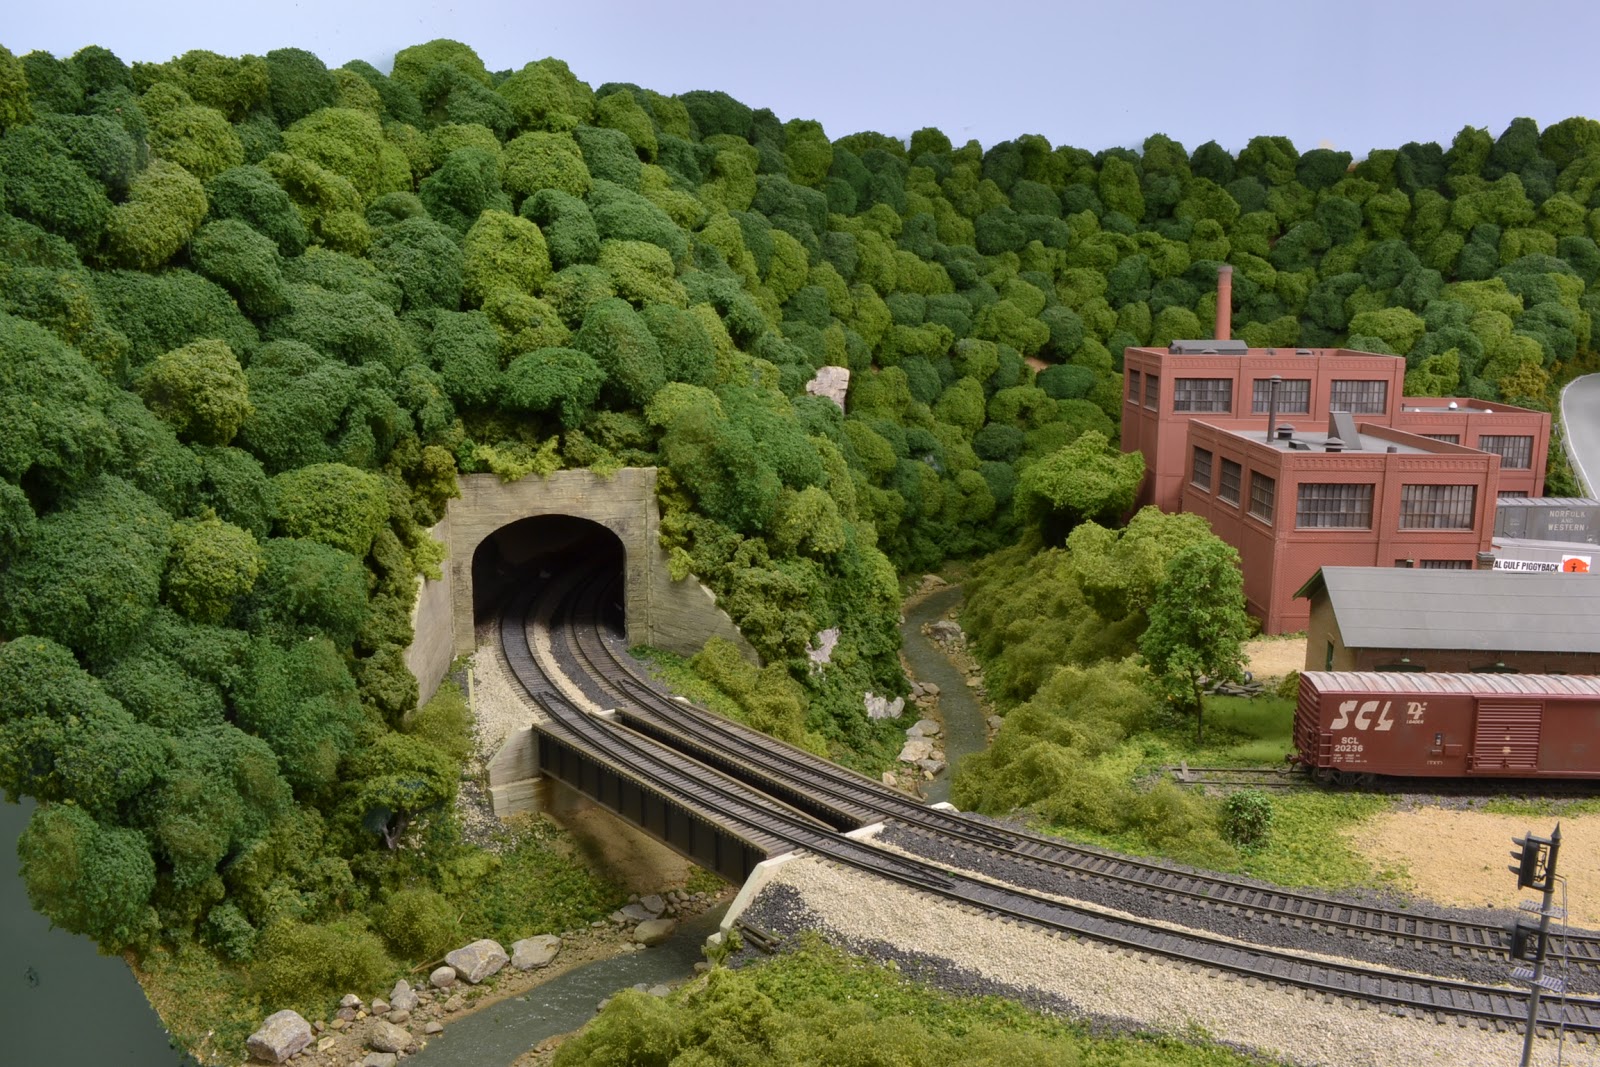
The shot below shows the recently completed section along with North Pierce, WV, which is across the isle. The area around North Pierce is the first area on the layout that was finished. It's somewhat ironic that this is also the first area that is going to be re-done. The main line here and the yard lead go into hidden staging and as I've mentioned here before, the line then heads to an unusable hidden storage yard.
Also, the trees on the hillside here are from an old layout and I've found a much better way to make polyfiber trees. I attempted to replace the trees in this area but the scenery is just too deep- I can't even get to it with a creeper.
Planned changes include having the hillside behind the factory extend to the wall and the stream curving out of site to the left. The yard lead will now join the main about in the center of the photo above and a single main will cross the stream. The main line will then proceed into a tunnel, through the wall and into the new 12-track staging yard that will be built in the other room. In addition to improving the scenery in this area, the new staging yard, which represents all locations west, will greatly improve the operation of the layout. I'm looking forward to seeing the first train cross the entire layout and head into the west staging yard!
Over the past few weeks, I have added some finishing touches to several areas of the layout. I installed some black skirting at the bottom of the fascia from just east of Big Chimney, WV around the isle to Logan, WV. The material was purchased at Banasch Fabric Outlet and is held in place with wooden clothes pins. I used a hot glue gun to fasten the clothes pins to the back of the fascia and the bottoms of the control panel and bill box support boards. All of this took about two hours, including the 40 minute trip to the store and back to purchase the material. Here's a look at the finished product.
I also found a permanent (at least I hope) solution for the bill box labels on the layout. As a short-term solution, I printed up the names of the locations represented by the bill boxes on Avery labels and applied them to each box.
For the permanent solution, I printed up the same Avery labels but used a white font with a black background. I think this looks a little less obtrusive but still allows the crews to be able to read the labels clearly. I inserted the labels, without removing the backing, into 3 1/2" clear file tabs and then trimmed the tabs to fit the lael. The tabs were spray painted with a matte finish prior to installation on the bill boxes in order to reduce the reflection from the lights.
The last addition was a schematic drawing of the layout that was mounted at each town, yard and junction. I got this idea from Bob Bartizek and his beautiful Pennsylvania & Western layout which you can see here: http://www.pennwestrr.com/. The schematic drawing helps the operators know where they are on the layout in relation to other locations on the layout.
These finishing touches have really improved the overall look of the layout and will hopefully help the crew feel more comfortable when operating the layout.
It took much longer than I anticipated to finish the scenery at SJ Cabin. I got caught up in a number of other projects, including several operating sessions on the layout and operating on a number of other layouts in the area. But here are some shots of the finished area.
Switch stands have been added, ties have been placed between the rails on the main and the yard lead so that the MofW Department can get the speeders out, and some rusty barrels have been added next to the signal maintainer's shed.
A scratch-built oil tank has been added behind the cabin and an electric switch motor now provides dispatcher control of the siding at Hollister Yard. There is also some subtle weathering on the ties at the switches to represent oil stains.
Some tie plates by Monster Model Works have been added next to the section house along with some ties and a speeder trailer.
And lastly, shot of the area with a coal empties extra leaving Hollister Yard. The real payoff for all of this work is when you finally get to run some trains through the scene!
I finished a small truck dump tipple for Big Chimney, West Virginia this past weekend and thought I would post a few pictures. The structure is based on two tipples on the Clinchfield Railroad. The first is a small truck dump tipple located at Haysi on the Clinchfield Railroad. There are some great shots of this tipple in Bob Helm's book titled "The Clinchfield Railroad in the Coal Fields" that were taken by Everett Young. The second is a small tipple that was located at the south end of Dante Yard. You can see a photo of the tipple at Rob Wolshlager's Clinchfield Country website here: www.clinchfieldcountry.com. The structure was scratch-built using styrene shapes and strips, Plastruct shapes, stripwood, and Campbell Scale Models corrugated siding.
.JPG)
.JPG)
Construction took a lot longer than I thought it would, but as the structure sits between the main line and the fascia, I wanted it to be a fairly detailed model. You can see some in-progress photos here:http://cwerailroad.blogspot.com/2012/04/progress-on-truck-dump-tipple.html.
Here's a shot of the overall scene.
The crews that work the Big Chimney Roustabout should now have a better idea of where the empty hopper cars should be spotted.
The track plan for the layout is shown in the stone age drawing below. When I drew the plan back in the early 1990's, I used HB lead because it was easy to erase. That made the drawing too light to scan, so I eventually went back and re-traced it with darker lead. It's still pretty rough, but it depicts the basic layout and features of the railroad. I've made several attempts to draw it with some of the layout design software that's available now, but it always ends up being a lot of time and effort for something that's already complete.

The Chesapeake,Wheeling and Erie is a small class 1 railroad that runs from Erie, PA to coal docks on the Chesapeake Bay. The railroad was constructed primarily as a coal hauler to take coal from the mines in West Virginia and Pennsylvania to Great Lakes and Tidewater ports (think Virginian). The line runs south from Erie, PA, has a branch that goes to Wheeling, WV and one that runs east to Pittsburgh, PA, and then heads into West Virginia. The layout represents a portion of the line from approximately Thomas, WV to New Market, Virginia. The main line then runs through Virginia to the Chesapeake Bay. The "Central Belt" moniker comes from the geographic location of the railroad.
The layout is point-to-point with two 6-track staging yards (one above the other) located in an adjacent room. The main line enters the layout from New Market (staging) and the first stop is Nelsonville, VA. There is a small yard here along with an engine servicing facility. Two branch lines leave the main here: the Dry Creek Branch and the Wilson Bridge Branch. The Wilson Bridge Branch Branch serves as the yard lead for Nelsonville and proceeds into staging. The Dry Creek Branch actually connects to the other side of the layout by running through hidden track around the perimeter of the room (more on this design flaw later). There is a connection between the main and the Dry Creek Branch that serves as a wye to turn equipment. The photo below shows the yard at Nelsonville with the main line at Summit Springs running up above the yard.
After leaving Nelsonville, the main line continues to Summit Springs where a large coal preparation plant is located along with a smaller tipple. You can see photos of the prep plant on this post: http://cwerailroad.blogspot.com/search?updated-min=2011-01-01T00:00:00-05:00&updated-max=2012-01-01T00:00:00-05:00&max-results=5. Many of the locations on the layout can be seen on previous posts. The main line then crosses the Dry Creek Branch and punches through the summit (backdrop) to the other side of the mountain.
At Sand Fork Junction, the Sand Fork Branch leaves the main and heads up the holler to serve three separate mines and a team track. The main line continues from the junction down the 2.5% grade to Big Chimney, WV. There are several industries and two coal load-outs located here. The Elkwater Branch also leaves the main and enters a two-track staging yard that connects back to the main at Petersburg Junction. After leaving Big Chimney, the main line crosses under the Sand Fork Branch and continues to Petersburg Junction, where the Purgettsville Branch comes in from staging. The main line then continues to Hollister Yard at North Pierce, WV.
Hollister Yard serves as the coal marshalling yard for all of the mines and load-outs west of Sand Fork Junction. The yard includes an engine service facility at one end and a car repair facility, including two RIP tracks, at the other end. Numerous mine and branch runs are dispatched from Hollister Yard, and way freights make set-outs and pick-up here. There is also a local yard job that services the industries in and around North Pierce.
After leaving North Pierce, the main line enters staging and runs around the perimeter of the room to connect with the Dry Creek Branch. There is a 6-track staging yard along the wall beneath the main line and Sand Fork Branch that is all but inaccessable now. Hidden staging is great, as long as it is easily accessable. Cars will derail, track will move and things will need to be cleaned/checked regardless of the care taken during construction.
The 6-track staging yard that is now unusable will be replaced with a 12-track staging yard that will be located in the other room and will represents locations and connections to the west. The main line will leave North Pierce on a single track and will punch through the wall to staging. The two bridges will be removed and the scenery will be re-done in this area. This will fix another problem with the layout- I absolutely cannot reach the scenery at the back of this area, even with a creeper. I have no idea what I was thinking when I built the scenery so deep here.
The other two 6-track staging yards will now be used for connections to the east and the Wilson Bridge Branch. My friend Stuart Thayer has been scheming to have a run-through freight from some foreign road connection come on the line from this branch along with some foreign road power to jointly switch the tipple at Nelsonville. A lot of new ideas for operating the layout have come out of the recent operation sessions, and I'm excited about the possibilities for expanding operations.


.JPG)

.JPG)
.JPG)
.JPG)
.JPG)
.JPG)
.JPG)
.JPG)
.JPG)
.JPG)


.JPG)
.JPG)
.jpg)

