Thursday, December 29, 2011

Tipples, Truck Dumps and Prep Plants- Part 2

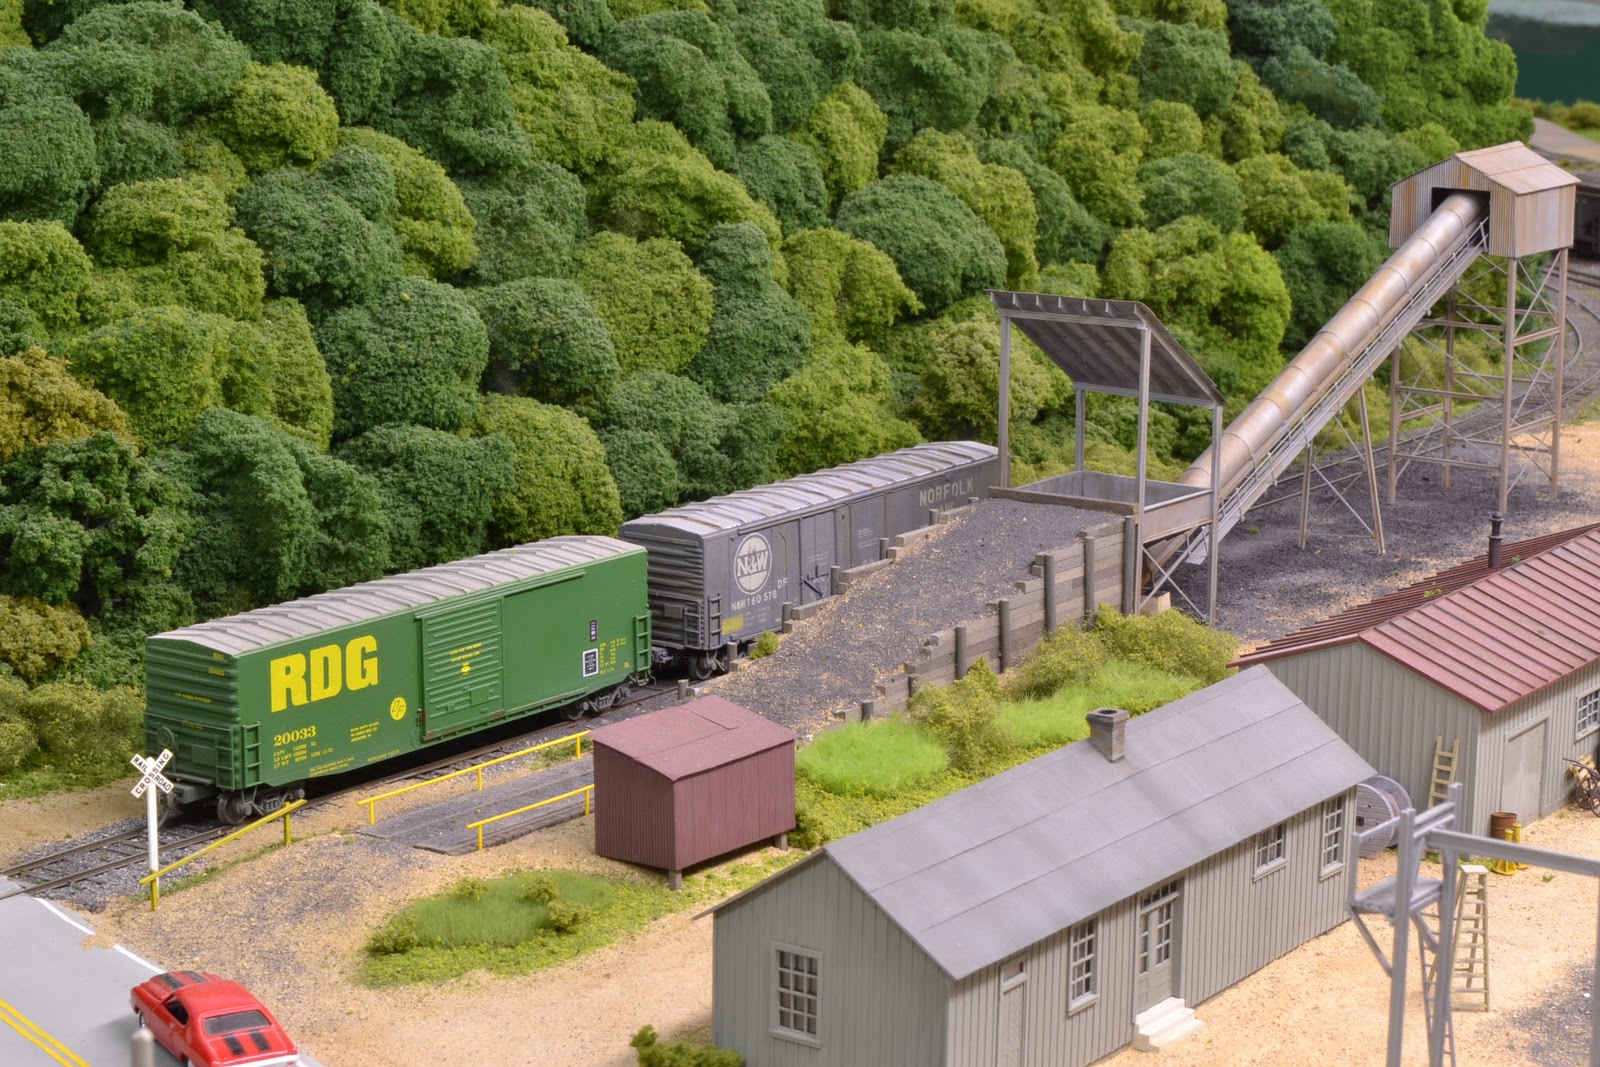
Picking up where the tour ended in Part 1, we leave Dry Fork and head down the Sand Fork Branch to Irma, where the South Branch loader is located. This facility is fed by a system of conveyor that run up the side of the mountain to the mine entrance. The South Branch loader generates 3-4 loads a day.


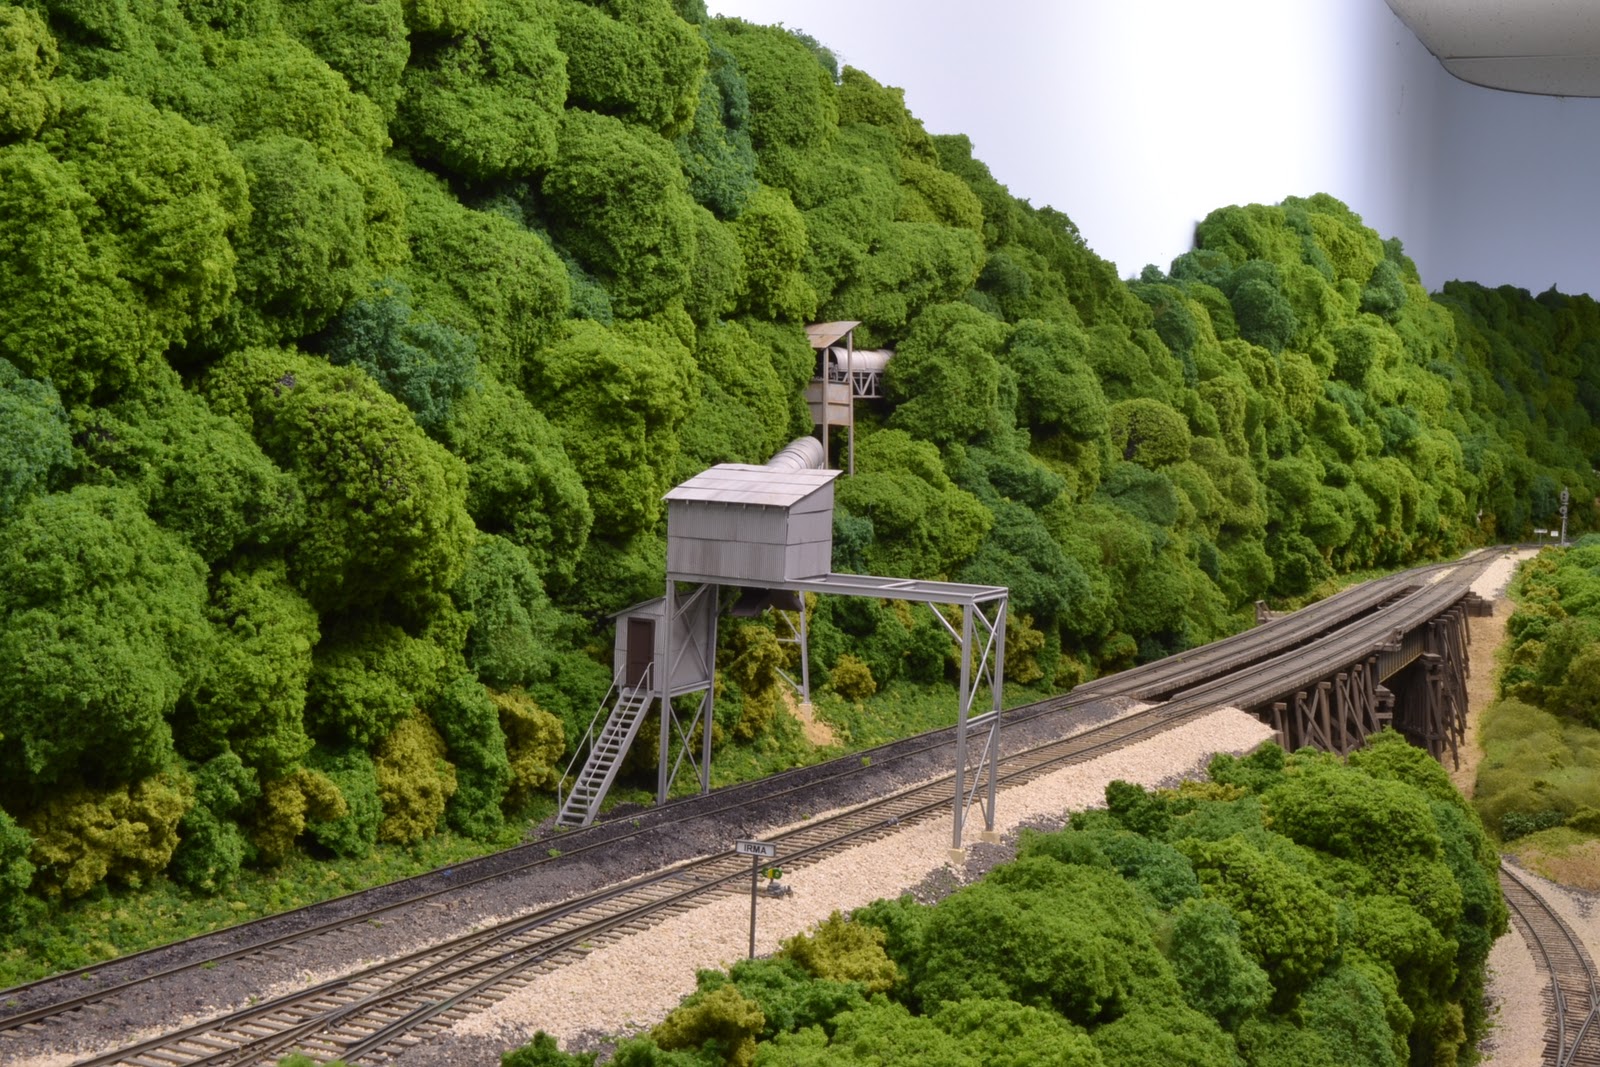
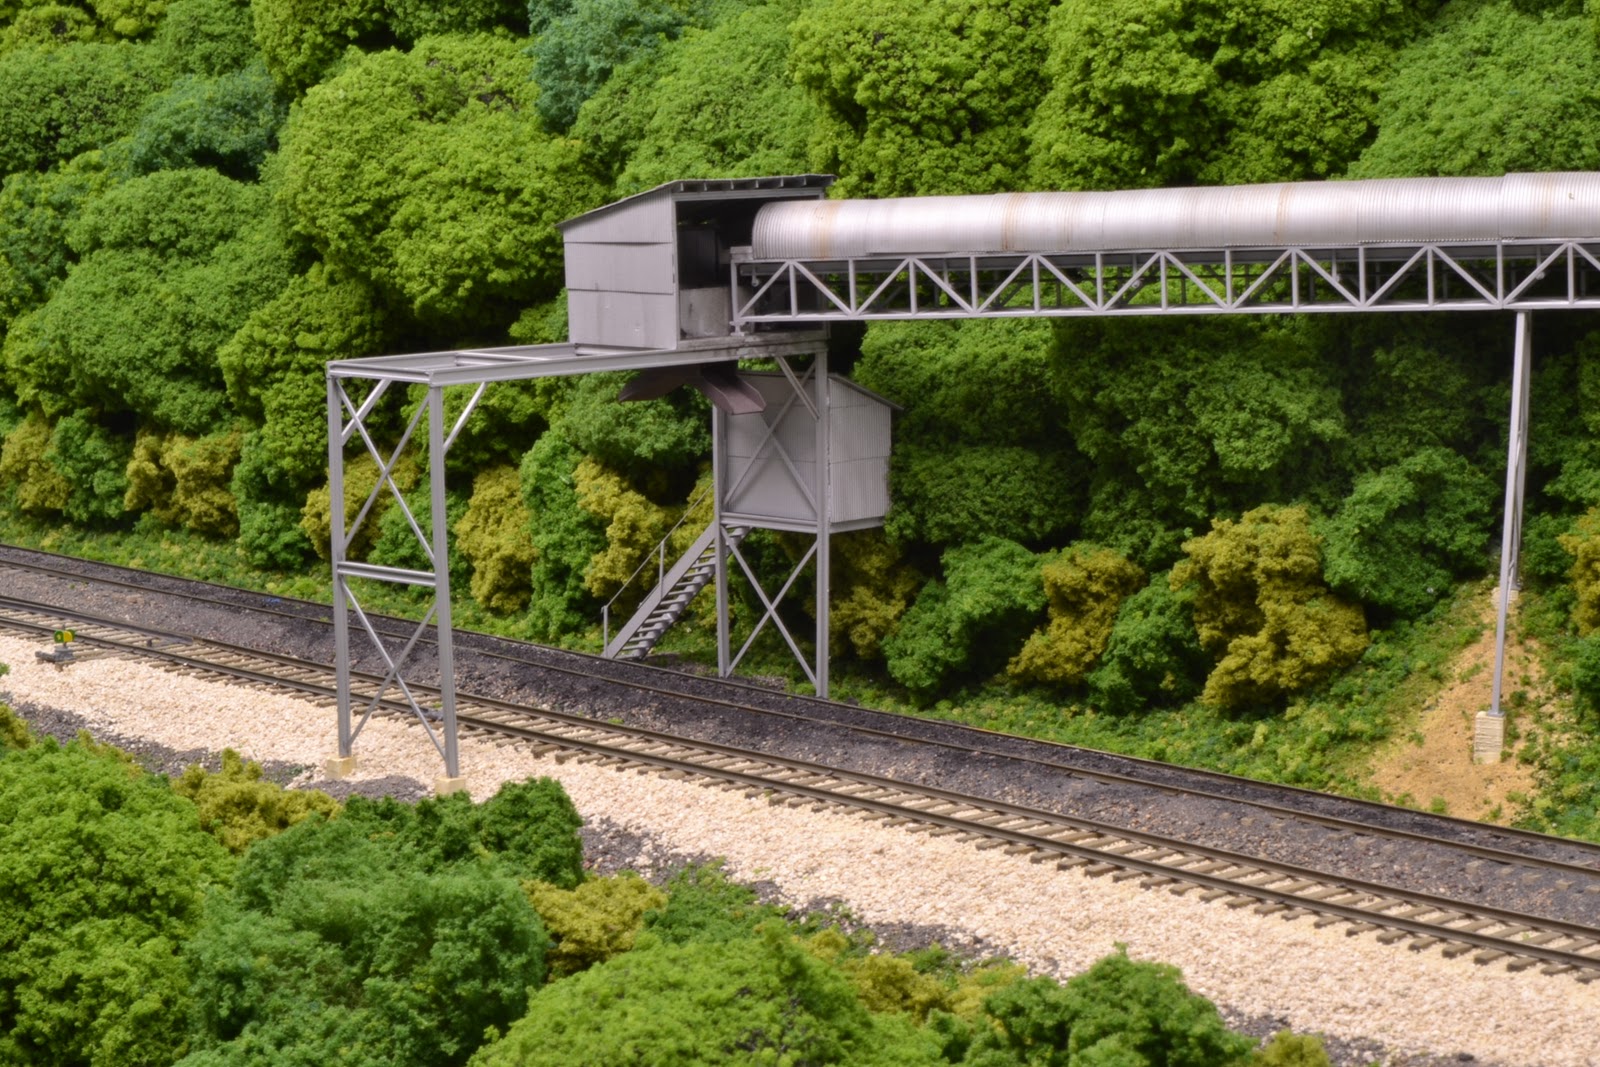
This facility was scratch built using styrene strips and various forms and Campbell Scale Models corrugated siding. The conveyor base is a Walthers kit with a walkway added and corrugated siding bent to form the conveyor covering.

At the end of the Sand Fork Branch is the McHenry Coal Company tipple. This facility is also fed by a system of conveyors that run up the side of the mountain and loads 9-10 cars per day.


This structure was scratch-built using plans of a tipple in Adena, Ohio on the old NKP that appeared in the July 1980 issue of Railroad Model Craftsman. The basic frame of the structure was made using Plastruct i-beams and then Campbell Scale Models corrugated siding was added. The conveyor was scratch-built using styrene strips and shapes, .020 brass wire and a Detail Associates etched metal roof walk for the walk way. The design of the conveyor is based upon the beautiful model of the Open Fork One tipple on the Clinchfield’s Nora Spur that Don Cassler built many years ago. When I built this back in the late 1980’s, the only reference photos I had were several pictures of Don’s model that appeared in MR and RMC along with a photo from MR’s series on the Clinchfield. Also, note the mailbox on the side of the railroad phone both that used for waybills supplied by the mine. The area around the tipple will have additional details added, including a power pole and transformer, along with additional layers of coal dust and cinders.
Leaving the Sand Fork Branch, we head up the Main Line to Summit Springs where several coal loading facilities are located. The first is Dry Creek Coal #2 which is located just past the long trestle at the end of Summit Springs tunnel. This facility is fed via conveyor and loads 6-7 cars per day.


This facility will be scratch-built and will be based upon Clinchfield Coal’s Jacob Fork tipple.

On the other side of the main from the Dry Creek Coal tipple is a short branch that leads to the large preparation plant at Summit Springs. Laurel Ridge Coal Company’s Tipple #5 generates 15-17 cars per day and is the largest facility on the layout. Coal is delivered via conveyor from mine entrance further up the mountain.


This structure was kit-bashed using two of the Walthers New River Mine kits. The design is based upon the Traux-Traer Coal Company’s Raccoon mine that was located at Kayford, West Virginia on the C&O’s Cabin Creek branch. I only had views of one side of the structure to work with, so the side facing the end of the tracks was “imagineered” using photos of similar facilities. There will eventually be an office, a tank for the oil that was sprayed on the coal loads and several other small support structures around the tipple.

After leaving Summit Springs we head down the other side of the mountain to the small yard at Nelsonville. There are several branches that connect to the main here and this small yard is used primarily to assemble coal trains from the loads that come off the branches and to make up the locals that deliver empty hopper cars to the mines.  The Wilson Bridge Branch leaves the main line here at Nelsonville and there is a small load-out just past the lead to the yard. This facility will be fed via a truck dump and will load 6-7 cars per day.


This structure will be based upon the Dixie Mining Company’s truck dump that was located on the C&O at Pikeville, Kentucky. Several photos of this facility appear in Tony Koester’s book “The Model Railroader’s Guide to Coal Railroading” which I highly recommend to anyone interested in modeling a coal hauling railroad.

I hope you have enjoyed the tour of the tipples, truck dumps and prep plants on the modeled portion of the Chesapeake, Wheeling and Erie. I plan to share the construction of some of the tipples and load-outs here in the future, so stay tuned.

Friday, December 16, 2011

USLX 10874

 I originally purchased this Atlas double plug door boxcar a number of years ago when I was looking for a specific car to provide hardwood to the Weber Furniture plant at North Pierce, WV. I found this kit at a local hobby shop and purchased it on the spot. Most of the rolling stock on my layout is based upon a photos I have seen that shows cars as they appeared in the mid- 1970's. In this case, the reporting marks indicated the car was built in 1974 so I relied upon Atlas to have accurately depicted the paint scheme for this particular boxcar. I intended this car to look fairly new, so I painted the trucks and underframe Floquil Grimy Black, added the consolidated stencil and ACI label and scratch-built the cut lever. Finally, I weathered the entire car with a light dusting of Floquil Grime on the sides and a special mix of weathered brown on the ends and coupler boxes. The photo below shows the car as it appeared at this time.


As with many of my modeling projects, the inspiration for this one came out of nowhere. I had never been completely satisfied with the appearance of this car, and I couldn't quite figure out why.  Walking past the car as it sat in the yard at Nelsonville one afternoon, it struck me- all of the detail was washed out. On top of the light color of the car, the overspray of Grime had effectively erased the fine detail on the car doors and elsewhere. As I picked the car up to observe it more closely, one of the trucks fell off. That was it- off to the shop for screws for the trucks and a new paint job.

Before beginning work on the car, I searched the web in hopes of finding a photo of a similar car. I found what I was looking for at the Railcar Photos website- here's a link to the photo: http://www.railcarphotos.com/PhotoDetails.php?PhotoID=47289. This photo was taken by Craig Walker in 1980 which is a few years after the 1976 time period I'm modeling. Also, the car in the photo has the Evans-USRE ends while the model has the Evans ends. However, the paint scheme is very accurate so I chose to ignore the incorrect end panels.

The first step was to remove the other truck and drill the holes in the bolsters with a number 50 drill. I make it a practice to attach all trucks and couplers with screws, but in this case I had made an exception and relied upon the plastic pin that came with the kit. I have no idea how the pin came loose, but it doesn't matter. The point is to not violate the basic rules you have established for trouble-free operation- or pay later. After drilling the truck bolsters, I tapped a hole for a 3/16” #2-56 screw in each. I also sent the trucks to the paint shop to receive a coat of custom mix weathered brown that will serve as the base for additional weathering. I then sprayed the sides, ends and roof with Dullcoat to serve as a base for the weathering.

I have started using acrylic washes based upon the information and techniques that I’ve found on a number of model railroad sites, and I’ve been very pleased with the results. For this car, I mixed a bit of burnt umber gouache and ivory black gouache with Microsol to make a wash. Prior to applying the wash, I made a template out of styrene to cover the herald on the right side of the car. I then cut out a piece of masking tape using the template and covered the herald. I wanted to see if I could get the yellow on the car sides a little darker than the yellow in the herald, as can be seen in the photo. I applied the wash to one of the sides and then began removing it after rinsing the brush with Microsol. My goal was to leave just enough of the wash behind to settle into the creases in the detail and leave a slight coating of grime in other areas on the car. To my surprise, the Dullcoat started coming off in small globs and a bit of the Floquil Grime was removed too. Fortunately, I got lucky- the wash left behind just enough grime to highlight the details and removed enough of the Floquil Grime to get the car closer to its original colors. I checked a notebook that I keep with comments on various painting projects and found a note stating that Dullcoat should be allowed to dry for at least a week before using the Microsol washes. Otherwise, the Microsol tends to either craze the Dullcoat or remove it. This project was right on the cusp of the one-week timeframe, so I changed the note to read two weeks for the drying time. The photo below shows the boxcar after the first wash was applied.


After the sides had dried, I went back over the coupler boxes and stirrup steps to with a slightly thicker wash of the burnt umber and ivory black gouache. I also added a little raw umber gouache to the couplers and coupler pockets. The photo below shows the results.


Once the sides and ends were finished, I applied a light wash of ivory black gouache and Microsol to the roof. My goal was to highlight the ribs on the roof and add just a bit of grime. After this dried, I dipped a small brush into the ivory black wash, removed most of the paint and then lightly stippled areas of the roof to represent the very beginnings of rust. The photo below shows the completed roof.


To finish the project, I applied a wash of acrylic burnt umber and ivory black and Microsol to the trucks with a cosmetic sponge. I then made a slightly thicker mix of the burnt umber acrylic and Microsol and dabbed this on with a sponge. The objective with this method is to add some depth to the weathering. I then applied a mix of burnt umber and Microsol to the wheels and added straight burnt umber and ivory black randomly with a brush to achieve some variation in the wheel color. After cleaning off the wheel treads, here’s the result-


The addition of the wash to the sides really helps the details "pop" and the subtle effects of the weathering help make the car look like a closer representation of the prototype.

Thursday, December 8, 2011

Tipples, Truck Dumps and Prep Plants- Part 1

One of the most common structures found on any coal-hauling railroad in the eastern part of the United States were facilities for loading coal. These structures ranged from simple ramps were used by trucks used to dump coal directly into hoppers cars to massive preparation plants where coal was sorted, cleaned and ultimately loaded into long strings of hopper cars. From the initial stages of layout design, I had always planned to have a number of coal loading facilities on-line that would be served daily by shifters, turns and roustabouts (as the many locals that served the mines in L&N coal country were named). So let's take a tour of the existing and planned tipples, truck dumps and prep plants on the North Pierce Subdivision of the Chesapeake, Wheeling and Erie.


The first stop is the Allison Coal Company loader located at North Piece, West Virginia. This facility is at the west end of Hollister Yard and is located behind the RIP tracks. The loader is served by trucks which are weighed on the scale before dumping coal into the loading bin. This facility generally loads 3-4 cars per day.


The structure was scratch-built using styrene sheet, strips and various structural forms. The scale platform was made from bass strip wood and the scale house was made from Campbell Scale Models corragated aluminum siding over a wood frame. While this structure isn’t based upon any specific prototype, I used photos of numerous
The next stop is Big Chimney, West Virginia. Here, there are two locations serving the various mines in the area. The first is the Harney Coal loader #2 which is on a short spur that was originally used as a team track. The spur comes off the line from the Purgettsville branch which joins the main just past the station at Big Chimney. This facility generates 3-4 car loads a day.

The structure was kit-bashed using parts from the Walthers New River Mine kit along with various structural shapes. The loading bin was scratch-built based upon the Open Fork One tipple on the Clinchfield's Nora Spur and the models of this structure by Don Cassler that appeared years ago in MR and RMC. I drew up scale plans for the bin by estimating the size of the structure in the pictures and then using several dump truck models to make sure the dimensions appeared close.
Across the tracks from Harney Coal #2 is the Mill Creek  #3. This structure will sit at the end of the long spur next to the main line which also serves as the base for helper operations assisting trains up to Summit Springs. The structure will be another truck dump and will be a combination of several small truck dumps on the Clinchfield and the L&N. The facility will load 3-4 cars per day and will be switched, along with Harney Coal #2 and several other industries at Big Chimney, by the Big Chimney Roustabout out of Hollister Yard at North Pierce.

Next, we follow the main line to Cedar Falls Junction where the Sand Fork Branch leaves the main and heads up the “holler” to serve a number of coal loading facilities on the branch.


In the picture above, the Sand Fork Branch leaves the main to the left and heads across a long trestle to Dry Fork while the main continues across the trestle to the right as it approaches Summit Springs. At Dry Fork, below, a short spur leads to the two-track Consolidated Coal tipple #4. This facility is also served by trucks and generates 4 cars per day.


This facility is based upon the Cumberland loader at Trammel on the Clinchfield, and any Clinchfield fan will recognize it instantly. The structure was scratch-build using Evergreen sheet and strip styrene, styrene channel and Campbell Scale Models corragated aluminum siding. The windows were salvaged from a kit (the name and manufacture of which I have long forgotten) and just happened to closely approximate the windows in the Cumberland loader. The conveyor was scratch-build using styrene shapes and strips as was the loading bin. I scaled the buildings in the photos I had by using the distance between the rails and drew up plans. Once I was reasonably satisfied with the dimensions, I made a cardboard mock-up to make sure it would look right and fit the tracks at this location. One lesson learned here- make sure the tracks under the tipple are spaced to accommodate the structure. I laid the tracks first, and realized later that they should have been spaced wider apart in order to accommodate the walkway between to the two tracks. As a result, I had to omit this detail from the model.
That’s it for Part 1. In Part 2, we’ll travel to the end of the Sand Fork branch and then follow the main to Summit Springs to visit some of the mines on the other side of the ridge.